Page 4
Back to Page 3.
Back to Page 1.
I had intended to stack the bricks from the ground up. It looked good when I dry stacked it. But, when the feed and exit were in place it becomes hard to bridge the gap.... even harder to make it look nice or at least right.
So I decided to weld a ledge around the bottom of the top of the core just above the area reserved for the seal strip.
While I have welded a number of things in this project, I would have still done it much the same way without the welder. I am welding because it is here and I need to learn welding.
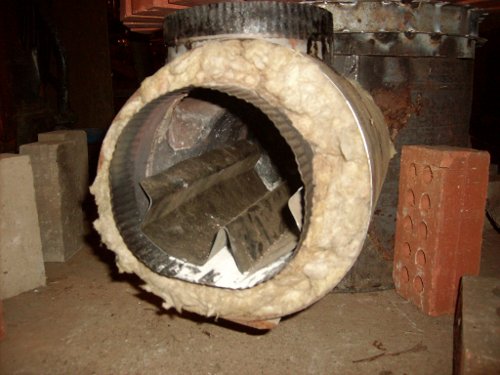
| I took some sheet metal about 12" by 13" and formed a shield for the bottom of the burn tunnel. I formed a ridge in the center to hold the fuel a little off the bottom. I also added a ridge along either side to give a path for secondary air. This is to replace the pipe I used temporarily last time. |
|
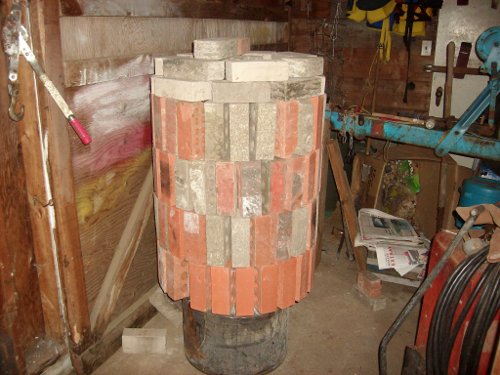
| This is the first row of mass in place. As this is to be portable, it is not permanently fastened. If it were permanent, then mortar could be put between the bricks giving a more finished (not Finish) look as well as adding more mass. Because I started the mass two rows up, my weight estimate of 600 lbs is reduced to about 450 lbs. |
|
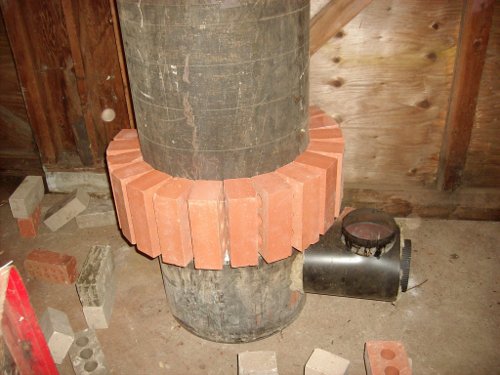
| Here is the "shelf" the bricks sit on. As can be seen, it doesn't have to be very big... this stuff only sticks out about 1/2 inch. I found it helpful when lifting the top of the core to place it back on the bottom. |
|
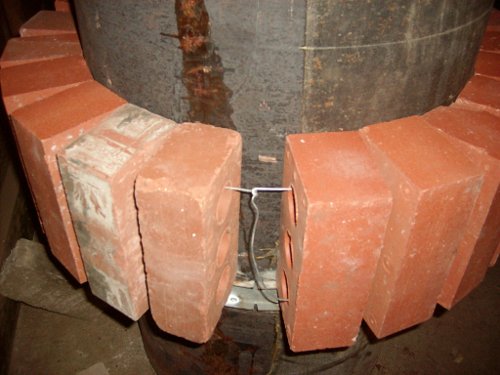
| A steel wire holds the bricks against the barrel. This can be cut off so the bricks can be removed for transport. The core can be moved as is or taken apart to two or three pieces. I would like to use steel strap with a screw to tighten like the smaller hose claps found on car heater hoses. They would be easier to reuse and stronger. |
|
| Four rows of brick. A half row is needed for the top. I've just stacked some bricks there for now but would like to do something nicer. I have ideas but they involve cutting brick. |
|
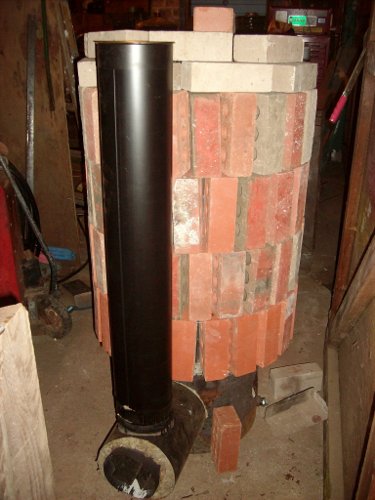
| Here it is from the front with the bricks in place and the feed cartridge as well. I need to cap off the insulation still and make an air restricter too. My idea for air restricting is to take a standard cap (like the one on top of the cartridge) and cut out a nice design to make 1/4 cross sectional area. The fire will glow nicely through this. A second cap can be used (if needed) to cap it off when not burning. |
|